Configuring UNIFYBroker for use with IIS
For environments utilising the Identity Broker Web Component, or for finer control of security, access and other settings, UNIFYBroker can be configured for hosting by IIS.
In order to successfully connect with IIS, ensure that the UNIFYBroker self-hosted option is disabled. See Configuring for use with embedded web server for more information.
Setting up for use with IIS 8
Continue configuration using the steps for IIS 7.5.
Setting up for use with IIS 7 or 7.5
Right-click on Sites in the Connections pane and select Add Web Site....

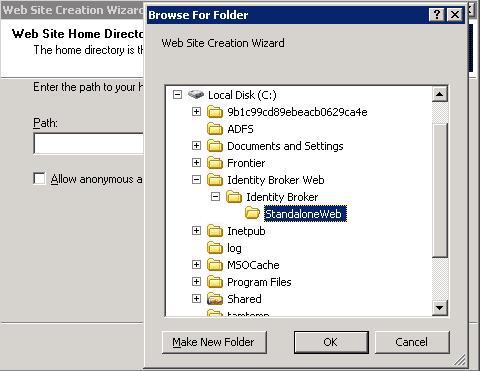
Configure the website settings appropriately, ensuring to use a port that is not already in use. Ensure that the site is appropriately named, then select the physical path of the UNIFYBroker Web directory.
For a default install, this will be the Web directory. For an install utilising the optional Identity Broker Web Component, this will be the StandaloneWeb directory.

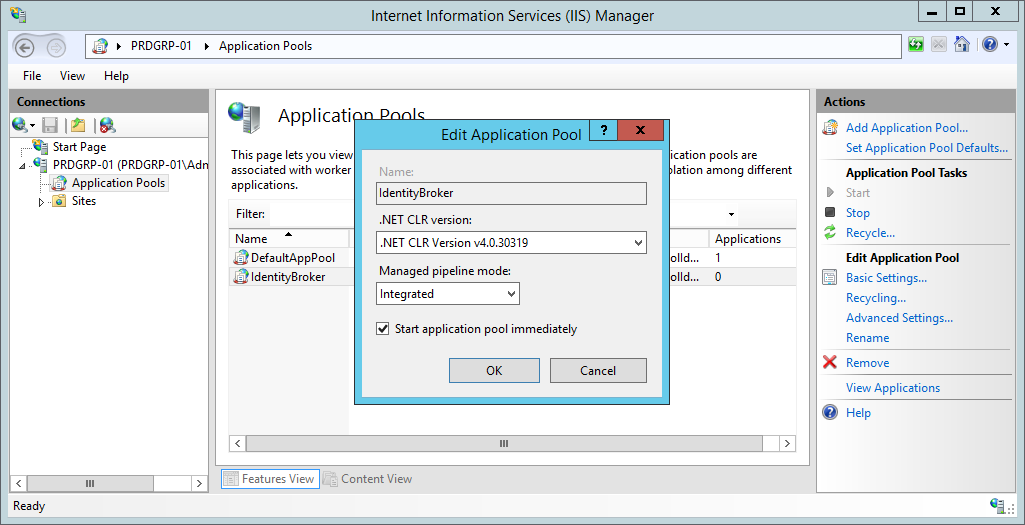
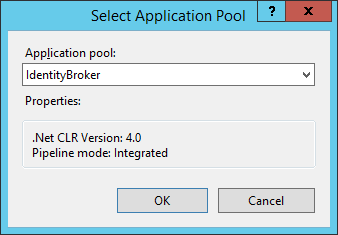
Select the appropriate application pool by using the Select... button.
Confirm the site settings are correct, then click OK.
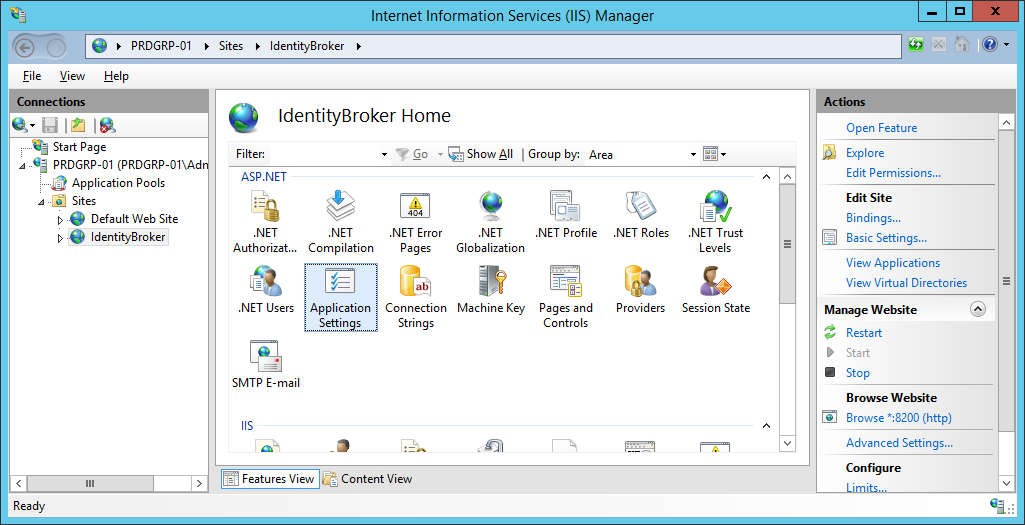
Select the appropriate site in the Connections pane and navigate to Application Settings.
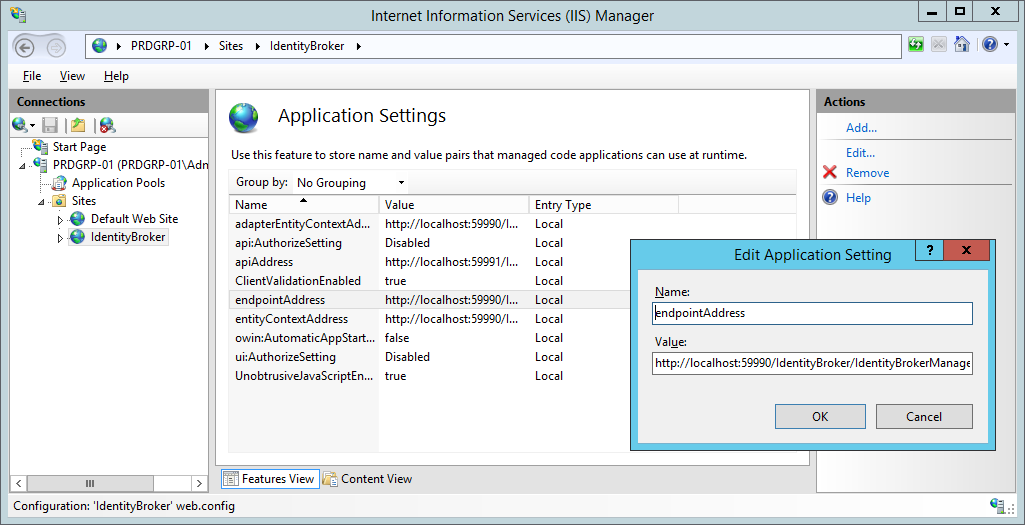
Ensure the UNIFYBroker endpoint addresses are correctly configured and pointing to the UNIFYBroker service, then click OK.
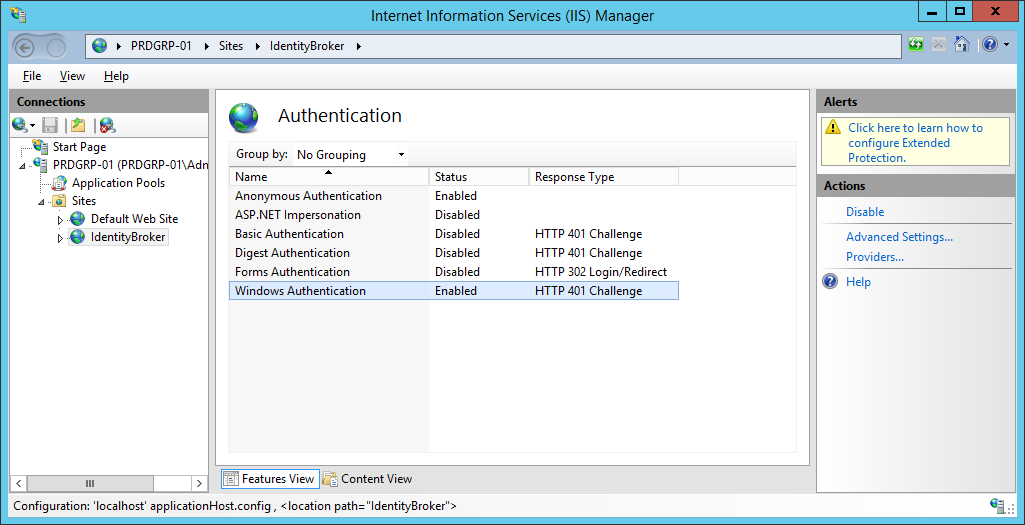
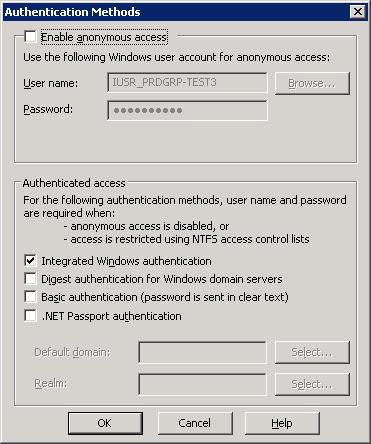
Select the appropriate site in the Connections pane and navigate to Authentication.
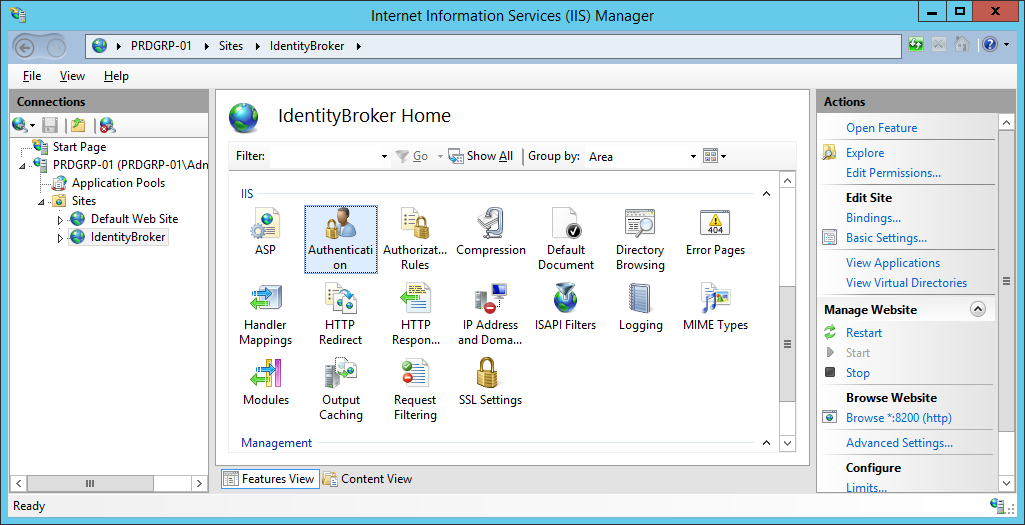
Configure the web site to use Windows Authentication, and turn Anonymous Authentication off.
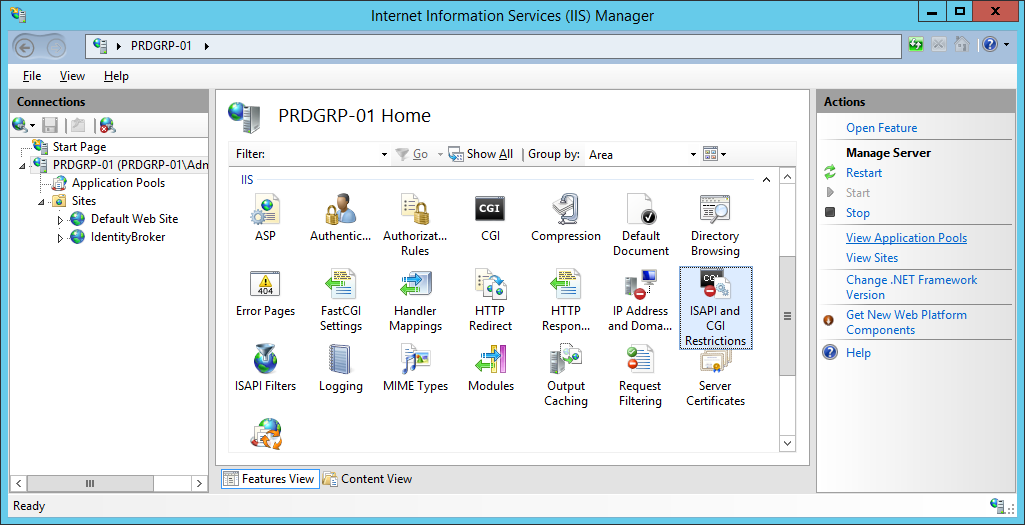
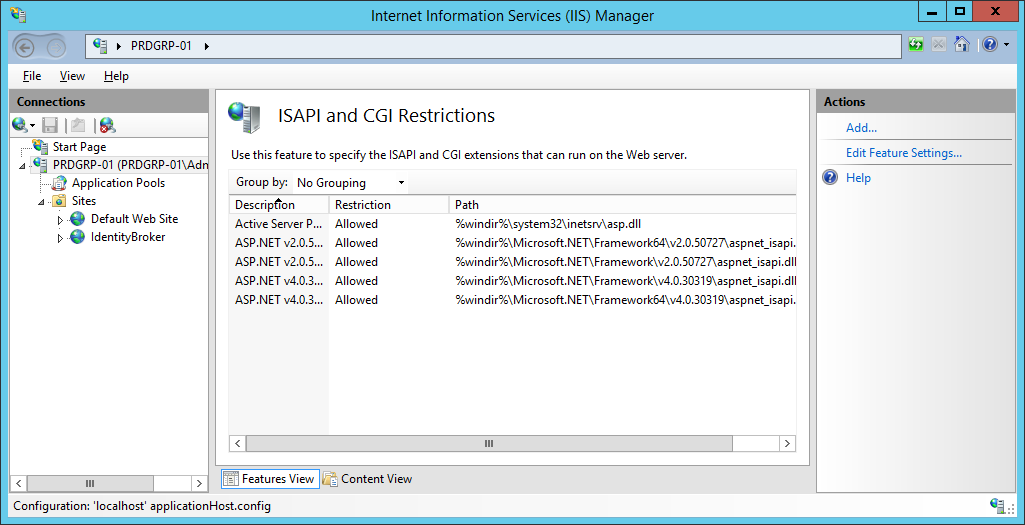
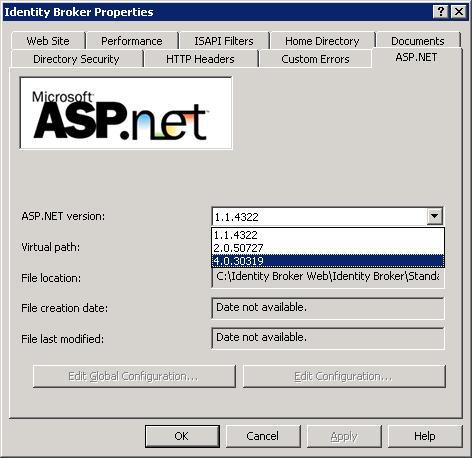
On the server Home page, confirm ASP.NET v4 is correctly configured under ISAPI and CGI Restrictions.
C:\Windows\Microsoft.NET\Framework64\v4.0.30319>aspnet_regiis.exe -ir
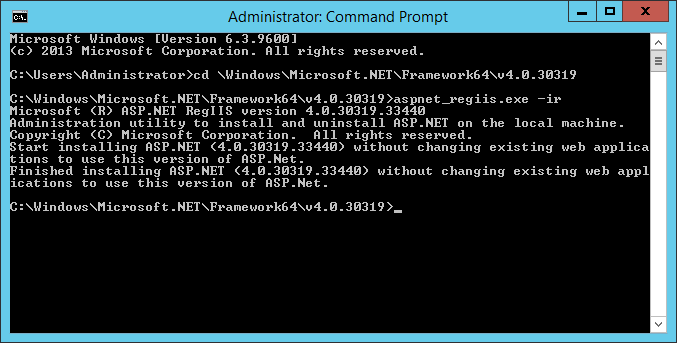
Refresh the tab and verify the presence of the ASP.NET v4 entries. Ensure both are set to Allow.

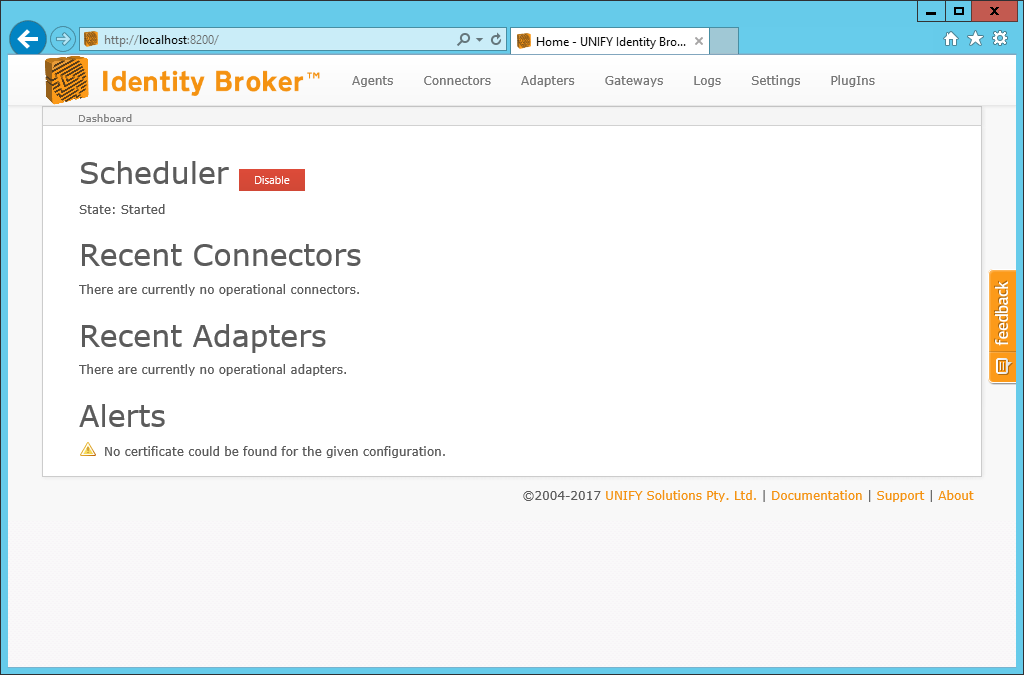
Confirm that UNIFYBroker has been successfully configured by browsing to the configured address, or by browsing from IIS Manager.

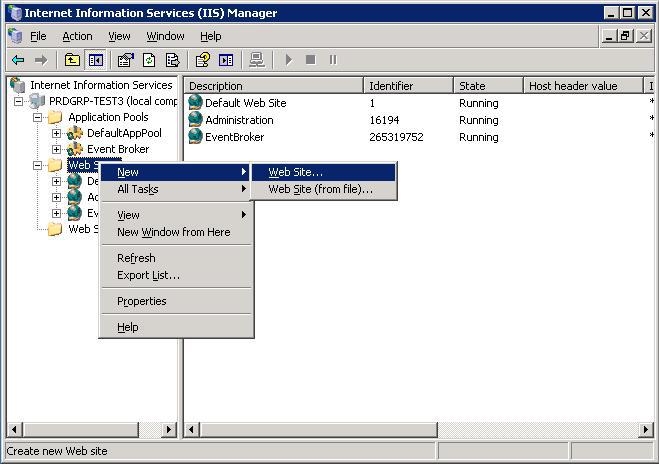
Setting up for use with IIS 6
Add a new Web Site from IIS Manager using the menu item New followed by Web Site.
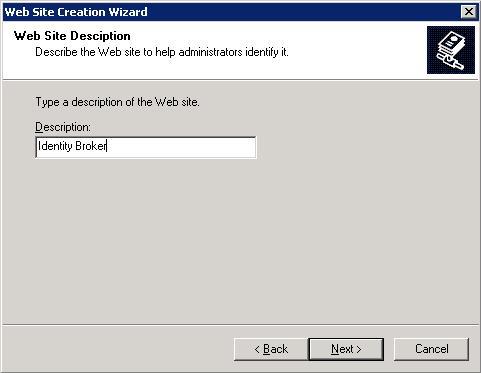
Enter a name for the site in the site description.
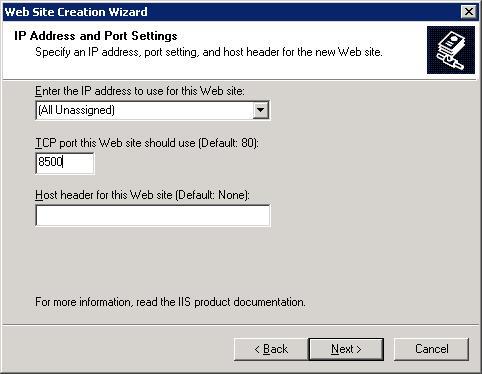
Configure the settings of the site. Ensure that the selected port is not currently in use, keeping in mind whether the self-hosted option is still in use. Consider turning the self-hosted option off.
Select the physical path of the UNIFYBroker Web directory. Turn anonymous access off.
For a default install, this will be the Web directory. For an install utilising the Web Component, this will be the StandaloneWeb directory.
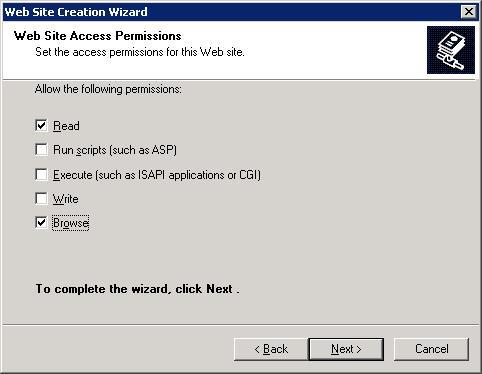
Configure the permissions of the site as required.
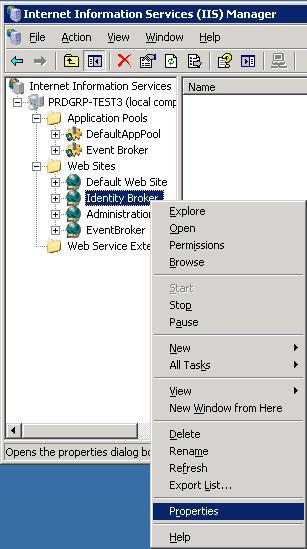
Once the wizard has completed, right-click the new site and navigate to Properties.
Navigate to the Directory Security tab, then Edit under Authentication and access control.
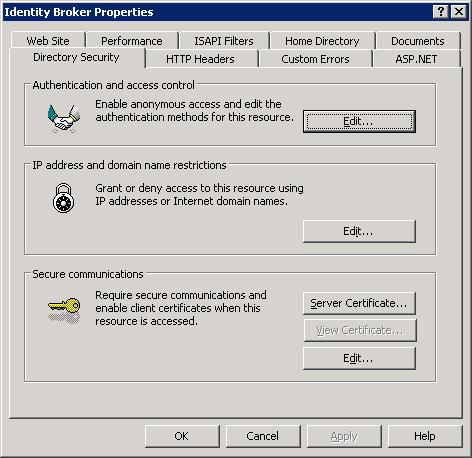
Ensure that anonymous access has been disabled, and that Integrated Windows authentication is enabled. Click OK.
Under the ASP.NET tab, select ASP.NET 4.
The UNIFYBroker Web Component must be configured to point to the location of the UNIFYBroker Service. Locate the Web.config file. For the default install, this will by default be located at C:\Program Files\UNIFY Solutions\Identity Broker\Web\
For the web component, this will by default be located at C:\Program Files\UNIFY Solutions\Identity Broker\StandaloneWeb
Locate the endpoints of the following format:
<add key="endpointAddress" value="http://localhost:59990/IdentityBroker/IdentityBrokerManagementStudio.svc"/>
The value must be modified to match the location of the UNIFYBroker service. Typically, this involves changing localhost to the name of the server on which the service resides for each endpoint address.
Browse to the UNIFYBroker website at the address specified, or by clicking Browse from IIS.
Customer support service by UserEcho

The required server roles can be added using the following PowerShell command:
Thanks to Matt Woolnough for supplying this.
Even after running Matts script, 'CGI and ISAPI Restrictions' does not appear as an option in IIS. Broker loaded OK in my test environment without checking it but do you know why this option doesn't appear?
It's quite confusing, so here's my take.
Firstly, "ISAPI and CGI restrictions" is an IIS Manager feature. But it's not clear which Server Role is required to make that feature appear in IIS Manager. Here are the Server Roles which show in the Server Manager wizard:
None of these are unambiguously the right thing. Perhaps "CGI" is the one that's needed?
The image above shows which Server Roles are installed in my test VM, which is successfully running Broker and Broker/Plus (for both development and testing run-time activities). However, in IIS Manager the ISAPI and CGI restrictions feature isn't visible:
I therefore believe (contrary to the advice above) that the ISAPI and CGI restrictions feature may not actually be required for normal function of Broker.
Note: my finding above are for IIS 10.0.
This says the ISAPI Extensions OR CGI needs to be installed. http://middlewarewarrior.blogspot.com/2014/12/isapi-and-cgi-restrictions-missing-iis.html I have both though.
Are you looking at the configuration for a website or the server? Refer to the screenshot and take note of what item in the Connections pane is selected.
Beau you're spot on. I was looking in the wrong place! :-(
Beau, exactly which optional Server Roles must be installed in order to enable ISAPI and CGI restrictions in IIS >= 8? Right now it's not actually specified or shown in this knowledge base article.
I have just spoken to Matt, and for a up-to-date server running IIS 10 in 2019 here is a picture highlighting the specific server roles that are required: